Friday, November 15, 2013

Vagrant + VirtualBox + Ubuntu for linux development

The combination of Vagrant, VirtualBox and Ubuntu allows for some interesting potential.  First of all, its a simple way to build and deploy cloud images similar to Amazon Web Service's AMIs, but all on your local machine.  It is also capable of customizing the virtual machine settings through a configuration file leaving us the opportunity to create full linux development desktop experiences.  Finally, it allows us to run linux containers (such as docker) on Windows and OS X environments in an extremely simple way.

The use case I will be showing in this post is for people who prefer bare metal installs of either Windows or OS X, but would like to have a full screen linux environment such as ubuntu running gnome.  With Vagrant and VirtualBox, this is universally possible.

First, please head to http://git-scm.com and download the git installer.  For windows, make sure to install the unix tools, its worth it.  The installer for windows will get openSSH installed which is required by Vagrant.

Next step:  Install VirtualBox.  Once virtual box is installed, also install the extension pack.

Finally, Install Vagrant.


Once all the dependencies are installed, open up a shell window and lets get started.  We will use a base cloud image from Ubuntu 13.04 found on http://vagrantbox.es.  Vagrant works in project directories, so first create a project folder.  Inside the project folder we will initialize a default configuration file and start an instance.  Once the instance is ready we will install ubuntu-gnome-desktop.

$ cd ~
$ mkdir ubuntudesktop; cd ubuntudesktop

$ vagrant box add ubuntu http://cloud-images.ubuntu.com/vagrant/raring/current/raring-server-cloudimg-amd64-vagrant-disk1.box

$ vagrant init

$ vagrant up


Once you issue vagrant up, a new virtual machine will be provisioned inside virtualbox.  Once the instance loads, vagrant will complete its tasks.  At this point we can use vagrant to SSH into the instance using public keys.

$ vagrant ssh


We have lift off.  Now lets install the desktop environment.  While inside the virtual machine instance through SSH, do the following:

vagrant@vagrant-ubuntu-raring-64:~$ sudo apt-get update; sudo apt-get -y install ubuntu-gnome-desktop

Wait for a while at this point.  Its going to install quite a bit of stuff (1.6GB to be exact).  Once it finishes, exit the ssh session.  Now that we are back on the host terminal session, lets halt the virtual machine and replace its configuration file with a more appropriate desktop capable set of configurations.

$ vagrant halt

Edit the Vagrantfile located inside the current working directory, which should be your project folder.  Replace its contents with the following:


Now that we have updated our configuration, start the instance back up and be amazed.  Yesss.

Now, login as vagrant (password vagrant).


Wednesday, October 23, 2013

Docker on EC2 Micro and maintaining storage growth

If you use docker for integration or continuous testing, you may be re-building images. Every command issued through docker keeps a commit of the fs changes, so disk space can fill up fast; extremely fast on an EC2 micro instance with 8GB of EBS.

Scrounging around the issues in the docker project on github, I ran across a thread talking about solutions for the storage growth. I took it and expanded a bit.

Below is the output of past and present docker commands. Anything with a status of "Up for x minutes", those are presently running docker commands. Anything with Exit 0 or other Exit values are ended and can be discarded if they are not needed, such as you do not need to commit the changes to a new image. In the screenshot below, you can see a re-build of the mongodb image. There are two commands the Dockerfile issued that stored commits and they can be discarded.

$ sudo docker ps -a


TO DELETE UNUSED CONTAINERS: 


$ sudo docker ps -a | grep 'Exit 0' | awk '{print $1}' | xargs docker rm

​This will find any container with a "I have no error" exit status and delete them. Note: There may be other exit statuses depending on how well an image build went. If some of the commands issued in the Dockerfile are bad or fail, the status field will have a different Exit value, so just update the piped grep command with that string.


TO DELETE UNUSED IMAGES: 


$ sudo docker images | grep 'none' | awk '{print $3}' | xargs docker rmi

This will find any images that are not tagged or named. This is typical when an image is re-built. For example: if you have a running container based on an image that was re-built, `docker ps` will show that container with a hash for its image name. That just means the container is running an old (and referenced) image. Once you stop the container and replace it with a new one, running the above command will find it and remove it from the file system.


Saturday, October 19, 2013

Closures, javascript and how

From the wiki article, a closure (computer science) is a function or reference to a function together with a referencing environment-- a table storing a reference to each of the non-local variables of that function.  

Closure-like constructs include callbacks and as such, are important in asynchronous programming.  Here is a simple example in PHP that uses a closure as a callback to compute the total price of a shopping cart by defining a reference table for the callback function and including variables tax and total:


The concept of closures in javascript is important to understand because you might not even know you're using it.  If you write in coffee-script classes or do classical inheritance patterns in vanilla javascript or even write callbacks in general for asynchronous programming, you are probably using closures.  The following example is a starting point for classical inheritance in javascript.  This shows how to hide private variables.  It doesn't use "new" but the pattern is very similar.


According to Effective Javascript: 68 Specific Ways To Harness The Power of Javascript, there are three essential facts regarding closures:
  • JavaScript allows you to refer to variables that were defined outside of the current function
  • Functions can refer to variables defined in outer functions even after those outer functions have returned
  • Closures can update values of outer variables

Knowing this, we can do some fun stuff in Node.JS with asynchronous programming.  With closures, we can pull a document collection from a NoSQL database, manipulate the results, and push it to an array stored via closure in the parent scope.


Hopefully you will use closures to your advantage, especially when developing in javascript, be it server side or client side or even in the database (Postgres with v8).


Tuesday, September 17, 2013

SharePoint 2013 - 503 Unavailable after March 2013 PU

SharePoint 2013 recently had two cumulative updates released:  March 2013 PU mandatory update, and the June 2013 CU.  I wont go into the details of obtaining these patches or running them.  Basically, you'll need a lot of down time to run the patches, as they take a while.  With that said, lets assume the patches ran, updated and completed.  Lets also assume you have already run the product configuration wizard after each patch to update the database.

For me, I had to run the patch a few times.  Due to randomness (or maybe just sloppy closed source coding) SharePoint CUs tend to fail.  The good thing, is that they either succeed 100% or fail completely (leaving SharePoint more or less in an OK state.  Luckily for me, I did not have any issues running the product configuration wizard.  I've seen and heard of instances where product configuration wizard fails, but its usually a clean up task that fails and isnt a big deal.

After I updated the March 2013 PU, I ran into a 503 unavailable for central admin and my site collections.  Instead of finding an immediate resolution, I plowed forth and installed the June 2013 CU with success.  Unfortunately after the database upgrade and a SharePoint server reboot, I was still getting a 503 error when trying to access SharePoint.

After a bit of googling, I found a working solution to this particular problem.  Load up IIS Manager and head to the Server Application Pools.  As per this post and for me, all of my Application Pools were stopped.  Without hesitation, I started every stopped pool, restarted IIS and once again was able to access Central Admin and my Site Collections.


Saturday, August 24, 2013

Using classical inheritance to contain express controllers and socket events

Coffeescript has +1'ed itself for me lately.  I will tell you why and try to explain.  As far as I know, there is no native support in coffeescript for having a class extend multiple parents classes.  In plain javascript, scope and prototypal inheritance can be confusing, as you'll see later on.

Lets imagine we are taking our express web application and isolating out the app routes and the socket events.  The reason for this is simple:  when a Web class extends the controller and event classes, they can share important pieces of information related to the web server such as a user session or login information.  This will help us later on when implementing socket events for authorized users.

Here is the entire bit of code to get you going.  It is simple, elegant, and for the most part completely readable as long as you have a bit of understanding in regards to the way prototypes in javascript work.


Here is the compiled, fully javascript compliant version.  As you can see, its a bit messy and definitely not as readable as the coffeescript version.


Happy coding.

Monday, August 19, 2013

Custom Nagios Notifications, now with Jade

Recently, I posted about using coffee-script and node-mailer to send custom Nagios notification emails.  While it is a great way of extending the capabilities of Nagios Alerts by allowing any arbitrary hook into other coffee / javascript apis (such as node-mailer), it is also capable of creating pretty HTML e-mails with the help of the Jade template engine.

Since I've already created the Nagios Command and bound it to my contact information, all I need to do is install jade into the project folder's node_modules:

$ npm install jade

We then need to create our templates.  Since I wanted to use a layout, I created a jade sub-folder in my projects folder.

Here is the layout (./jade/layout.jade):

Here is a neat header bar that I'm using(./jade/nav-bar-email.jade):

Here is the alert e-mail(./jade/nagiosAlert.jade):

Here is what my notify-service.coffee script looks like(/opt/bin/notify-service.coffee):


The final result is a pretty looking E-Mail. I'm viewing this with Mail.app in OS X.  Ive blanked out a few bits.  Just imagine there is Company Text to the left of home and a link between home and projects in the nav-bar


Sunday, August 18, 2013

Simple Callbacks - Executing parallel and dependent tasks using async without the sphagetti

There has been some bloggers complaining lately about the callback pattern and its spaghetti code structure.  Some even compare it to GOTO statements, although that post is less about coffee/javascript.  The beauty of javascript, especially written in coffee-script, is that you can conceptualize parallel and dependent tasks based on code indentation.  Commands executed in the same depth are executed at the same time, while code resting deeper (in the particular case of callback patterns) are deferred until dependent execution is complete.

The following image on the left depicts what I am explaining above.  Blue lines are executed at the same time.  Red lines are dependent on their blue parent's completion before they execute, and so on.

I then take the idea a step further and mix batches of parallel tasks with tasks dependent on the batch to complete.

This is a sample gist of personal work I am doing on a Project Management webApp. The goal of this gist is to show how non dependent tasks can be parallelized and dependent tasks can be run after those parallel dependencies are run. eachTask iterator takes a task object and a callback. It uses the Function prototype method call to pass scope to each parallel task.


Tuesday, August 6, 2013

Async HTML5 File Uploads with Node / Express Framework

File uploads with HTML5 these days is easy as pie, especially when you have a framework that handles everything for you, internally.  Combining Node, the Express framework and a little HTML5 magic with FormData and XMLHttpRequest, we can create a very simple file uploader that can support large files.

The Express framework supports multi-part uploads through its bodyParser middleware which utilizes the node-formidable module internally.


Start off with the client side.


Add the button click event with a bootstrap progress indicator


Add the server route.


Thursday, July 11, 2013

Basic CKEditor 4 Image Uploader with Express and NodeJS


I recently found an interesting article on a simple hack to get the existing image upload feature in CKEditor 3 enabled and functioning with a PHP server.  I took his idea and applied it to the latest version, which is currently 4 with a NodeJS and Express framework backend.

It basically requires editing two files inside the ckeditor sdk:  image.js and config.js.

Edit ckeditor/plugins/image/dialogs/image.js and look for "editor.config.filebrowserImageBrowseLinkUrl" around line 975.  A few lines below will be "hidden: true".  Change this to "hidden: false".  Further down is another "hidden: true" near "id: 'Upload'", which needs to be changed to "hidden: false".  Once you are done with the changes, image.js should look like this.

Next, we need to edit the config.js file to point to where the upload POST route is.  Edit ckeditor/config.js and add config.filebrowserUploadUrl = '/upload'


Next, we need to create our Express POST route to handle the upload.  I am taking the temp file name and prepending it to the actual file name and saving it under ./public/uploads.  Since public is a default static route in Express, any uploaded image will be immediately available in the CKEditor UI.  The important part here is to return a script block, instructing CKEditor to take the new image.


Finally, route it through express:

var fn = require("./upload.js");
app.post("/upload", fn);

Thursday, June 13, 2013

AWS Coffee-Script Web Stack - Part 1: The Development Stack

AWS Coffee-Script Web Stack - Part 1: The Development Stack


Welcome to a multi-part series on setting up an Amazon Web Service Coffee-Script Web Server using NodeJS and the Express framework.

Part 1 of this series consists of building up the server components in a nice stack on top of ubuntu linux.  By the end of this blog entry, you will have a basic personal website with the twitter bootstrap look and feel.  We will then expand on its capabilities and features as I write more posts on the series.  Some of these posts will include: adding connect-assets which allows you to include compiled coffee-script into the rendered templates, session management with redis-server for persistent session state across server reboots using oAuth providers such as google, combining sessions with socket.io for seamless authentication validation, and simple M(odel) V(iew) C(ontroller) structure with classical inheritance design.

The stack will consist of three main NodeJS components: node modules, server code, and client code.  It will run on two environments:  Internet facing AWS running Ubuntu Server 12.04 and a development environment consisting of Ubuntu Desktop 13.04 with JetBrains Webstorm 6 Integrated Development Environment (IDE).  The code will be stored in a git repository which we use to keep a history of all our changes.


Setup Development Environment

So, lets get going and setup our development environment.  First, download the latest Ubuntu Linux Desktop, currently 13.04.  While you wait for the ISO, go ahead and start building the Virtual Machine instance.  The following screens relate to my Virtual Host based on VMWare Fusion 5.


Virtual Hardware
The minimum to get going smoothly is pretty lightweight compared to other environments such as Microsoft's SharePoint 2013 which requires a good 24GB of ram for a single development environment.  This virtual machine should have at least 2 vCPU and 2GB RAM.  Depending on how big your project gets (how many files Webstorm needs to keep an eye on), you might need to bump up to 4GB of RAM


OS Volume
For OS volume, 20GB should suffice.  If you plan on making upload projects, then provision more storage.


Virtual Machine Network Adapter

I prefer to keep the virtual machine as its own entity on the network.  This clears up any issues related to NATing ports and gives our environment the most realistic production feel.
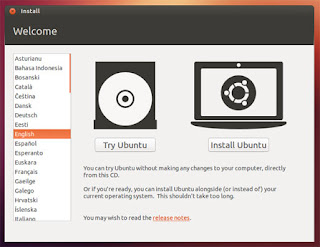


Install Ubuntu OS From Media

Boot up the virtual machine and Install ubuntu.


Update OS 

I prefer to keep my linux machines patched.

$ sudo apt-get update
$ sudo apt-get upgrade

Install Dependencies

Before we can really get going with Webstorm, we need to get vmware-tools installed for all that full screen resolution glory.  Once installed, we need to pick up g++.

$ sudo apt-get install g++

Now that we have our Ubuntu Linux Desktop 13.04 development environment setup, install nodejs, and also install our global node modules/binaries.

Install git, setup bare repository, use /opt for development

$ sudo apt-get install git
$ sudo mkdir /git
$ sudo mkdir /opt
$ sudo chown <username> /opt

$ sudo chown <username> /git

$ mkdir /git/myFirstWebServer.git
$ cd /git/myFirstWebServer.git
$ git --bare init

Install Node v0.10.15 (latest)
$ wget http://nodejs.org/dist/v0.10.15/node-v0.10.15.tar.gz

$ tar zxvf node-v0.10.15.tar.gz
$ cd node-v0.10.15
$ ./configure
$ make
$ sudo make install

Install global node modules and their binaries

$ sudo npm install -g coffee-script express bower

Creating our basic Express Web Server


I prefer to keep all my custom code inside /opt, so we will setup our Express web server there.  Set permissions as necessary.  We will also initialize git at this time.

$ cd /opt
$ express -s myFirstWebserver
$ cd myFirstWebserver
$ git init
$ npm install

Great.  Now that we have our basic Express Web Server, we can run it with 'node app.js' and visit it by going to http://localhost:3000 using a web browser.

Next, we want to convert all of our assets to coffee.  Use an existing js2coffee converter, such as http://js2coffee.org.  Convert and clean up your js files into coffee.

Your app.coffee code could look something like this:


Configuring bower and components

We will use bower to install client libraries.  Its like npm, and helps streamline deployments.   For our particular configuration, we choose the project folder's pubilc directory to store components since its already routed through express.
Configure bower (docs)

edit /home/<username>/.bowerrc:


Now that we have our basic rc setup for bower, we need to specify our client library dependencies in our project.

edit /opt/myFirstWebsite/component.json

Bower is completely setup and ready to install packages.

$ cd /opt/myFirstWebsite
$ bower install

Now that we have our client libraries, lets add references to them in the website's layout.
edit ./views/layout.jade:


Commit the changes and push to the code repository

Before we commit our changes, we need to setup a .gitignore file so we dont blast the code repository with stuff bower and npm deal with.  
edit /opt/myFirstWebsite/.gitignore


Now that we have successfully created a starter bootstrap enabled website, its time to commit our changes and push them to our source repository.  First, we will setup the repository origin.

$ cd /opt/myFirstWebsite 
$ git remote add origin /git/myFirstWebsite.git

Next, we will commit the changes to origin: 
$ git add .
$ git commit -a
$ git push -u origin master


Sunday, February 10, 2013

Node E-Mail Contact Form Submission Rate Limiting With Sessions

Using mongoose and coffee-script, I will layout a simple approach to limiting POST queries by client session id.

There are specific requirements for this POST route:

  • E-mail uses Gmail service account (provided by Node-Mailer)
  • Provide user feedback in real time (res.send)
  • Rate limit user's ability to POST over a defined interval (timestamps)


Lets create our model.  This collection will store our users submissions by session id.


Now lets define our app.post function.