Building my own personal CI/CD Platform
One of the more interesting concepts I have been focusing on lately is
continuous integration and development [and (re)deployment] of web based solutions and services. Combined with agile methodologies, social networking, and test driven development, it promotes healthy techniques and strategies to iterate successful solutions based on code for teams of developers and sysadmins alike.
In this post I will discuss my journey from Vagrant and SaltStack to my new adventure into Mesos. Ill quickly shame on the service discovery movement, and then close up with my progress and current project path researching
Mesosphere and
Software Defined Networking.
Agile Methodologies
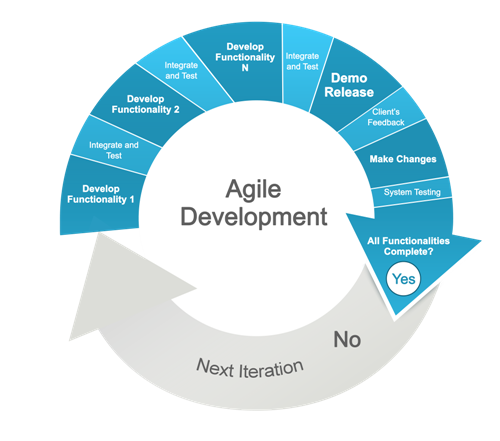
A common theme in my posts and work ethic includes the concept of
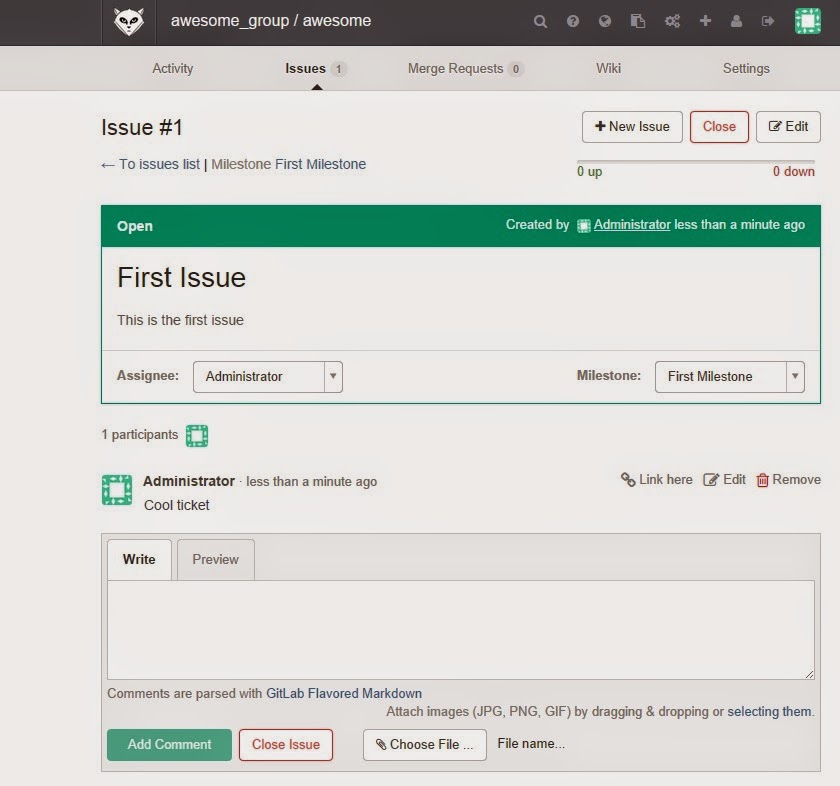
agile software development. It's a modern way to manage a technical project with many moving parts. Breaking down goals and milestones into iterative code changes and pushing them as merge requests is extremely self documenting and keeps others informed and engaged.
Agile Test Driven Infrastructure
Interestingly, this agile software development strategy can be applied to infrastructure as well. With Salt recipes, you can fully provision and manage infrastructure and network devices through a unified control interface. These recipes, which consist of yaml code, can be added to a git workflow. When recipes are changed, gitlab can hook into the commit and merge events and run test cases against the infrastructure with the new recipes. Since Salt recipes consist of states, they will either pass, change, or fail.
Since we can test the state of infrastructure against code changes, we can treat infrastructure like software and attack the project management of infrastructure with scrum and agile test driven development (but lets call it
agile test driven infrastructure).
SaltStack standardizes the way you manage infrastructure. Because of this, its possible to gauge the time effort necessary for completing a task. For scrum to be effective, tasks need to be scored on a time effort scale (1, 2, 4 hours for example) and assigned appropriately for maximum parallel tasking between team members to fill up the total time effort allotment.
Social Networking
You might not think social networking plays a part here. Ever hear of
github? Github drastically changed the way people code by making it cool and fun. Think of facebook, but for coders. The addition of the concept of merge/pull requests forces social interaction and code review. There is no better way to increase code quality than to have developers socialize and discuss the code in real-time.
Test Driven Development
I have been combining a number of open source projects to find a quick way to build an end-to-end platform for continuous integration and development (CI/CD). The use case was so I could embed CI/CD into my development work while also incorporating linux namespaces to save on compute and memory resources so I could run it locally, as well as for cost savings from providers such as AWS, DigitalOcean, On-Premise, etc when running a "production" version.
I want to push code, have it run tests and show me the output in real time, when tests pass it should restart my web service with the new code. Sounds simple, right? Actually, when you use SaltStack, Docker and Open Virtual Switch, it is!
The Journey
The journey began with a simple goal of building a development environment using Vagrant and have it run in much the same way a production system would. With my personal introduction to SaltStack, Software Defined Networking and Docker containers the journey turned into a twist of configuration management, cluster orchestration, resource management, containers, and software defined networking.
The goal was to create a super project centered on vagrant that was reusable and could be deployed in minutes. It had to be configured to mimic provider environments such as
AWS and
Digital Ocean and on-premise. It needed to be deploy, configured and run end-to-end locally as well as on any provider with the same effort and ease as issuing
vagrant up.
End-to-end implies that the solution deploys, configures, and starts up a complete infrastructure to develop applications using continuous integration and development. This applies to any provider in the cloud or on-premise.
The
Vagrantfile stores useful building steps for an environment and its application. It typically instructs vagrant to build a virtual machine similar to a production environment. My blog post on
Vagrant + VirtualBox + Ubuntu for linux development details working with Vagrant for locally running a development branch of an application. Since then, I've put a focus on scaling containers with as little effort as possible. Scale in this scenario means having docker containers communicate with each other across
n docker hosts where
n is an arbitrary number greater than one.
Enter Docker:
When I first started using docker containers to consolidate servers, I ran into the issue of streamlining them because of the need to pipe and forward ports. This caused complexity in a number of services including riak clusters, percona clusters, and other cluster type services. There was no straight forward pre-baked solution to pipe all the necessary components together across docker hosts. Therefore it was difficult creating a completely containerized environment for certain services.
Enter Service Discovery:
With the introduction of scale to the overall design, containers needed a way to easily communicate with each other across docker hosts, especially for database clusters and web applications with multiple components. Many service discovery projects started popping up on github. Some examples include
skydock,
etcd, and basic Docker patterns such as
ambassador linking or even just port forwarding.
The problem I have with this shift, is that its not solving the actual problem. A new problem is created because communication is now a crazy rats nest of port forwarding and a reliance on yet another service which could fail that keeps track of the information. Besides, how do you scale service discovery? Scaling service discovery, now hat's a whole issue itself.
My Path to Service Discovery:
I believe we already have a reliable service discovery technology stack. It exists in the networking layer! Combine mac addresses with DHCP to get
IP addresses matched with
DNS entries and your service discovery is an
arp table, available to any device attached to the network. Now, instead of re-inventing service discovery, we can simply "grease the wheel" by adding logic to Software Defined Networking such as customizing network flow and flow rates.
I chose to take a different path conceptualizing service discovery by using Software Defined Networking. Just like virtual machines run inside physical machines, SDN lets you create networks inside networks. Pretty cool, huh? Open vSwitch, in particular, has support for tunnel bridges, meaning you can virtually plug servers into each other like one big network switch. Then, you add docker containers to this bridged network, and they all communicate over layer 2 networking. No port forwarding or central discovery service required. All instances (virtual and containerized) that have an interface on the virtual switch bridge can talk to each other.
Enter SaltStack:
SaltStack is a great project. Defined on its
website, its a "
Fast, scalable and flexible systems management software for data center automation, cloud orchestration, server provisioning, configuration management and more". It's a configuration management system built on ZeroMQ and written in python. Recipes are written in yaml and the
DSL is easy to pick up. It's extremely modular and supports many different aspects of linux systems. State recipes provide a way to daisy chain installation and configuration of dependencies such as packages, services, files, etc for service components such as Docker and Open vSwitch.
I now use SaltStack with Vagrant to automatically enforce state recipes on a schedule which run simple bash scripts to setup and maintain the health of an Open vSwitch network and its bridges as well as dependencies for docker and its services. So, with salt I can deploy an end-to-end environment for CI/CD, but I still need to pre-determine which docker host my containers run on as well as keep an eye on resource utilization and manually shuffle containers around if needed. Besides that, containers always use the same IP so if I needed to re-deploy a component, it would be available once the ARP table was updated.
I started looking around at existing multi-host compute systems and realized that big data and compute clusters was exactly what I needed to magically place docker containers where they needed to go based on rules and resources.
Resource Management and Orchestration:
Where docker containers end up being run is pre-determined and written to salt recipes for the most effective stacking. This allows for iterative changes and additions when scale is needed. The only problem with this approach is the complexity of the switch interconnects defined in open vSwitch. As the number of docker hosts increase the number of interconnects increases exponentially. Having a large number of interconnects is not the problem, manually writing them is.
This is currently where I am in my journey and after looking around for a while, I think Mesos and its
deimos plugin for docker containers fits the bill quite nicely.
Mesos is a cluster technology that supports pretty much all existing cluster engines including
hadoop, google's
kubernetes, and others.
What do I want to do now? I want to incorporate Open vSwitch and
pipework in some way so that bridged networking can be deployed with containers kind of like how
openstack works with virtual machines and their networks.
The Prototypes
Vagrant Prototype v1
I started with my first prototype inside Vagrant on my local workstation. I wasn't ready to throw anything up in the cloud because I wasn't sure how many resources I would need and thus how much it would cost me.
As things progressed and all the networking was configured properly, I began to notice that I could run all the services I needed for the full life cycle of an application with very little resources (as low as 4GB of RAM). This included nagios monitoring, the java based kibana logging stack (elasticsearch and logstash), GitLab, GitLab-CI, salt-master and the Open vSwitch network itself.
Network saturation was low. Overall cpu load was also low. The only thing that I had to keep an eye on was memory utilization. Even that was alleviated with a little bit of swap and proper planning.
I could clearly run this on Digital Ocean for around $50/mo no problem.
Digital Ocean Prototype v2
The first cloud prototype was launched on Digital Ocean and worked flawlessly. With the use of UFW and changing the SSH ports, the environment was, for the most part, secure and safe from outside trouble. All cluster networking was contained to just the private network which was physically located inside the data center. There was a limitation, though. The private networking did not span across data centers so there was no way to securely enable multi-zone high availability. Servers would go down bringing services down with them, but because of the way containers were spread out, impact was minimal and services were quick to restore.
AWS Prototype v3
The latest working prototype was launched on AWS after
new EC2 pricing was announced. The pricing is actually cheaper than Digital Ocean, so it was a no brainer to move back over and take advantage of virtual private cloud (VPC) networks.
VPC is Amazon's own implementation of software defined networking, allowing you to create a restricted environment not exposed to the outside world. This allowed me to create a multi-zone highly available docker cluster completely isolated from the public internet. The only exposure into the cluster is through ssl load balancers, and only to expose specific services on specific ports.
Whats Next?
After a number of successful prototypes and months of rock solid stability in terms of uptime and network performance, I decided to move up on the technology stack and focus on auto provisioning and management of compute resources. At some point, manually adding hosts will become a challenge due to the exponential increase of switch interconnects. This is not as complicated as a problem as service discovery, however. A simple algorithm can be written to deal with switch interconnects..
This is where Mesosphere comes in. Mesos has plugins for spawning docker containers. Marathon is a simple interface which allows you to specify how much cpu, memory, and number of containers to create for a particular application. It then goes out and spawns a container where it fits resource wise.
I want to figure out a way to extend Marathon and Mesos (particularly deimos), so that creating containers includes steps for adding virtual networks (using pipework).
I get really excited thinking about the potential applications of this sort of setup. I know there are a lot of "docker clusters" out there, but I feel like exploiting traditional networking technologies and building a cluster on SDN makes more sense.
Looking forward to writing more, as things progress. Until then.


.png)


